[指南] - Crostini Multi Container 到 Debian ArchLinux Ubuntu企 🐧

🖱️如需本指南的更新后续内容,请 Fyde 为我翻译:▼

将当前 Debian 升级到 Bookworm 以获得更快的性能:

Debian Buster > Bullseye > Bookworm > Sid > Trixie(不稳定) :grey_exclamation:

设置您的用户密码,以防万一之后被询问(可选):sudo passwd your_user

sudo apt update && sudo apt upgrade -y && sudo apt install nano -y && sudo apt dist-upgrade -y && sudo dpkg --configure -a

这增加了应用程序的更好兼容性和更快的性能。
Linux 应用程序的安装似乎更容易,错误也更少。
这几乎就像您正在运行一个更正宗的 Debian。
Trixie 是 debian 的更高级版本,我相信 google 迟早会采用它。


这基本上就是你所需要的跨包版本 并将 url 更新为deb https://storage.googleapis.com/cros-packages/ to_that_version

sudo nano /etc/apt/sources.list.d/cros.list #每次重置。
sudo nano /etc/apt/sources.list #更改是永久性的

:100: Debian Bookworm 又名 Debian 12 Stable :dizzy: -有效的版本。 :white_check_mark:

sudo sh -c 'echo "deb https://storage.googleapis.com/cros-packages/122 bookworm main" > /etc/apt/sources.list.d/cros.list'
sudo sh -c 'echo "deb https://deb.debian.org/debian bookworm main" > /etc/apt/sources.list'
sudo sh -c 'echo "deb https://deb.debian.org/debian bookworm-updates main" >> /etc/apt/sources.list'
sudo sh -c 'echo "deb https://deb.debian.org/debian-security bookworm-security main" >> /etc/apt/sources.list'
sudo apt update && sudo apt install nala -y && sudo nala upgrade -y && sudo dpkg --configure -a && sudo apt dist-upgrade -y && sudo dpkg --configure -a

:space_invader: Debian 不稳定 Sid - 开发/不稳定。:alien:

sudo sh -c 'echo "deb https://storage.googleapis.com/cros-packages/122 sid main" > /etc/apt/sources.list.d/cros.list'
sudo sh -c 'echo "deb https://deb.debian.org/debian sid main" > /etc/apt/sources.list'
sudo sh -c 'echo "deb https://deb.debian.org/debian sid-updates main" >> /etc/apt/sources.list'
sudo sh -c 'echo "deb https://deb.debian.org/debian-sid bookworm-security main" >> /etc/apt/sources.list'
sudo apt update && sudo apt install nala -y && sudo nala upgrade -y && sudo dpkg --configure -a && sudo apt dist-upgrade -y && sudo dpkg --configure -a

:boom: Debian Trixie(未来的 Debian 13)(Google 还不支持/还不稳定):anger:

sudo sh -c 'echo "deb https://storage.googleapis.com/cros-packages/122 trixie main" > /etc/apt/sources.list.d/cros.list'
sudo sh -c 'echo "deb https://deb.debian.org/debian trixie main" > /etc/apt/sources.list'
sudo sh -c 'echo "deb https://deb.debian.org/debian trixie-updates main" >> /etc/apt/sources.list'
sudo sh -c 'echo "deb https://deb.debian.org/debian-security trixie-security main" >> /etc/apt/sources.list'
sudo apt update && sudo apt install nala -y && sudo nala upgrade -y && sudo dpkg --configure -a && sudo apt dist-upgrade -y && sudo dpkg --configure -a && sudo aptitude update

从 v122 开始 - Google 正式将 bookworm 添加到运行内核 6.1 的 crostini 中。


:penguin: 慢慢进入 Debian 13: :sparkles: sudo passwd your_user

sudo sh -c 'echo "deb https://storage.googleapis.com/cros-packages/122 bookworm main" > /etc/apt/sources.list.d/cros.list'
sudo sh -c 'echo "deb https://deb.debian.org/debian bookworm main" > /etc/apt/sources.list'
sudo apt update && sudo apt dist-upgrade -y && sudo apt autoremove -y
sudo sh -c 'echo "deb https://storage.googleapis.com/cros-packages/123 trixie main" > /etc/apt/sources.list.d/cros.list'
sudo sh -c 'echo "deb https://deb.debian.org/debian trixie main" >> /etc/apt/sources.list'
sudo apt update ; sudo dpkg --configure -a ; sudo apt install -f ; sudo apt clean -y ; sudo apt dist-upgrade -y ; sudo apt autoremove -y

^不会撒谎……你可能需要重复这句话两次,并且可能不起作用。


你可以玩的东西…致敬:

打嗝!


🖱️ 手动说明:🖱️

手动将 googleapi 包编辑为更新版本“122”并将其设置为 trixie:

debhttps://storage.googleapis.com/cros-packages/122 书虫主要

进入:

sudo nano /etc/apt/sources.list.d/cros.list

这个 cross.list不能更改 !如果更改…重新启动后它将重置

  • 只需更改它更新它并保留它。
    我不知道是否会有一个标志允许它永久更改而无需重置。
    截图 2024-02-02 16.36.43

deb https://deb.debian.org/debian bookworm 主要
deb https://deb.debian.org/debian bookworm-updates 主要
deb https://deb.debian.org/debian-security bookworm-security 主要

  • 下一个变化:bullseye 进入bookwormsudo nano /etc/apt/sources.list
    这里是事物可以共存并保持永久的地方。
    截图 2024-02-02 16.37.18

让魔法发生:

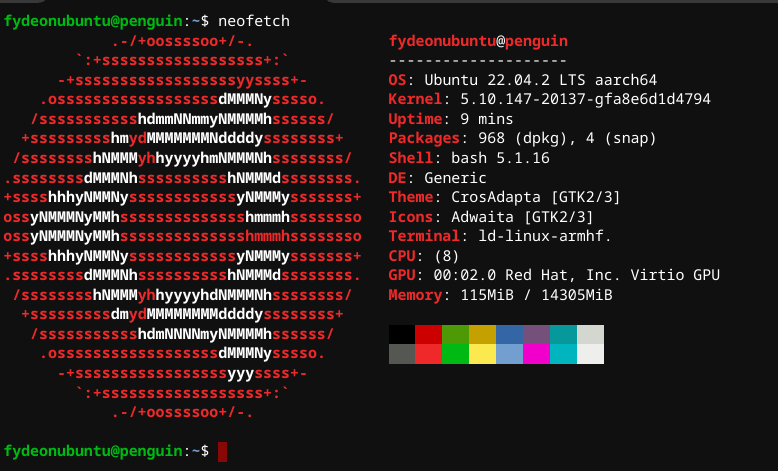
sudo apt update && sudo apt install nala -y && sudo nala 升级 -y && sudo apt dist-upgrade -y && screenfetch
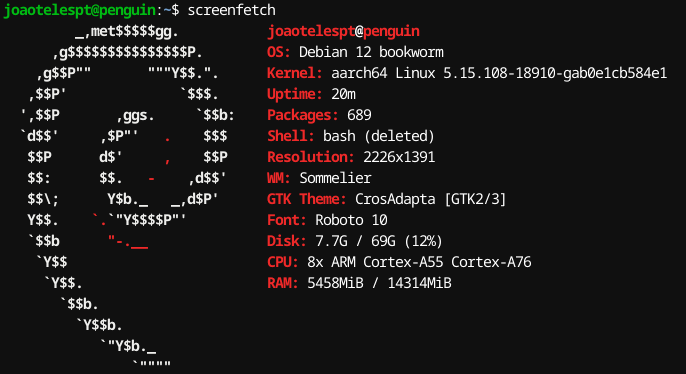
图像


🖱️ 如何重新安装:🖱️

crosh 壳:

vsh termina
lxc stop penguin ; lxc delete penguin
exit

如果出现错误,只需删除企鹅并重新启动它,不要忘记检查连接 - 强制关闭并重复。


🖱️如需本指南的更新后续内容,请 Fyde 为我翻译:▼

可用 LXC 实时图像列表

克罗斯蒂尼免费企鹅 :白色复选标记:

为了安全起见,首先保持原来的 debian penguin不变 ,只需启用 #crostini-multi-container 标志并再添加一个!

🖱️ 先给你的企鹅侍酒师添加一个Linux:🖱️

克罗斯蒂尼氛围启动并成为 LXC 专家:

打开多个容器的标志。
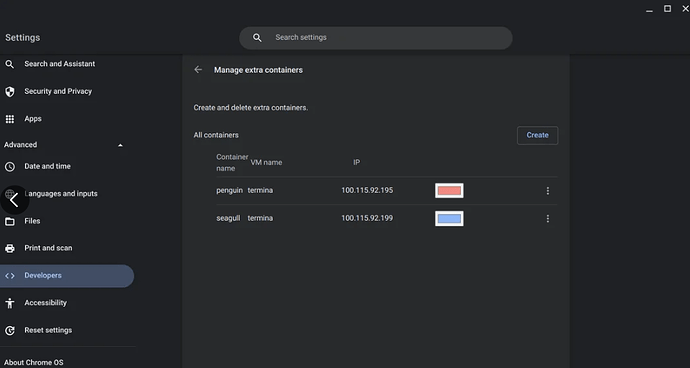
转到开发人员并添加另一个具有随机名称的容器,它将自动使用您的 IP 创建它。

🖱️授予与您的 Linux 容器的连接:🖱️

启动终端并通过执行 sudo ping google.com 授予您对互联网的访问权限 如果没有返回,则 :关闭Crostini并重新启动它。
6ab4158e696fc7a2a96f245bee273dc8a9d39091_2_690x227

如果需要,请重复该过程。

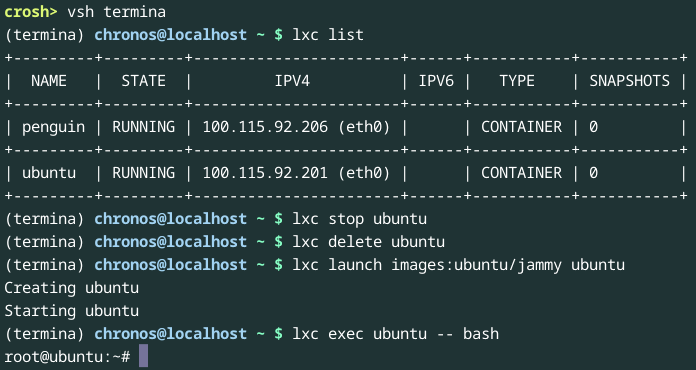
打开 Crosh 并制作 LXC Ubuntu 容器:

  1. 开始 Vsh 结束
  • Ctrl+Alt+T 打开 Crosh 终端。
  • 类型vsh termina
  • 如果看到(termina) chronos@localhost ~ $ ,则表示 Termina 已启动成功。

vsh termina # vmc stop termina / vmc launch termina
lxc list
# 克隆你的 Ubuntu 容器
# FydeOS 不能有 security.privileged 容器,openFyde 可以。
lxc launch ubuntu:noble ubuntu -c security.privileged=true
lxc exec ubuntu -- bash
# lxc stop / lxc delete / lxc start / lxc console
passwd # 设置 root 密码
🖱️ 用户可选:🖱️
sudo su root
sudo passwd root #set user root password

sudo adduser #newuser
sudo usermod -aG sudo #newuser
#sudo apt install nano
sudo visudo
#newuser ALL=(ALL:ALL) ALL
su #newuser

sudo sed -i 's/^# \(%wheel ALL=(ALL:ALL) ALL\)/\1/; s/^# \(%wheel ALL=(ALL:ALL) NOPASSWD: ALL\)/\1/' /etc/sudoers
sudo apt-key adv --keyserver keyserver.ubuntu.com --recv-keys 1397BC53640DB551
sudo apt update && sudo apt install nala git cabextract aptitude nano zenity screenfetch make python3-pip python3-apt python3-debian pandoc neofetch network-manager isc-dhcp-client isc-dhcp-server adwaita-icon-theme-full -y && screenfetch && lsb_release -a

#这两个包可以共存:
sudo sh -c 'echo "deb https://storage.googleapis.com/cros-packages/ bookworm main" >> /etc/apt/sources.list.d/cros.list'
sudo sh -c 'echo "deb https://deb-mirror.fydeos.com/cros-packages/ bookworm main" >> /etc/apt/sources.list.d/cros.list
if [ -f /dev/.cros_milestone ]; then sudo sed -i "s?packages?packages/$(cat /dev/.cros_milestone)?" /etc/apt/sources.list.d/cros.list; fi'

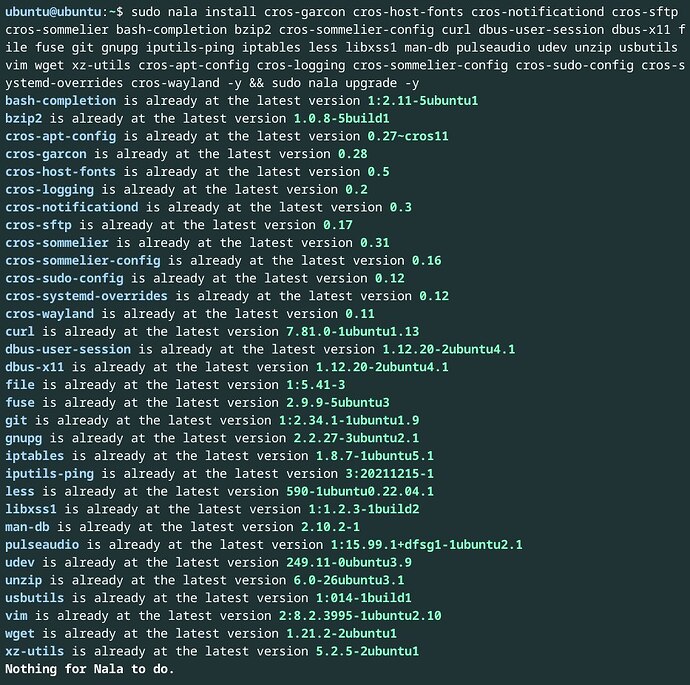
sudo apt update && sudo aptitude install cros-garcon cros-host-fonts cros-notificationd cros-sftp cros-sommelier bash-completion bzip2 cros-sommelier-config curl dbus-user-session dbus-x11 file fuse git gnupg iputils-ping iptables less libxss1 man-db pulseaudio udev unzip usbutils vim wget xz-utils cros-apt-config cros-logging cros-sommelier-config cros-sudo-config cros-systemd-overrides cros-wayland gtk2-engines-pixbuf libgtk2.0-0 libgtk-3-0 gtk2-engines-murrine -y && sudo nala upgrade -y
#全部完成!现在开始启动Crostini吧。
🖱️ Repo的绷带解决方案:🖱️
sudo rm /etc/apt/sources.list.d/cros.list #to clear anything not google/fydeos/etc.
sudo nano /etc/apt/sources.list #to clear things out.
cd /etc/apt/sources.list.d/ #to see whats going on.

crosh 浏览器 Ctrl Alt T,输入:shell
vmc container termina ubuntu --privileged true


🖱️ 企鹅快速入门(明白这个):🖱️

转到Crostini 终端, 打开 Ubuntu,第一次可能会失败 ,因此强制打开几次 ,并记住在打开后检查是否有连接。(它的作用…它尝试建立与 lxc 容器的侍酒师连接,但它有点…很容易失败)。

另外:首先启动 Debian penguin 可以修复连接,这样你就可以打开这个新更改的 linux

第三次就胜利了。


🖱️ 网络修复(最有可能需要):🖱️
systemctl --user restart cros-garcon.service
systemctl --user restart sommelier{,-x}@{0,1}.service
#sudo apt install dhcpcd -y # or dhcpcd5
#Check the network by running (it can't be empty) with:
ip -4 a show dev eth0
#if no connection then:
sudo dhcpcd eth0
sudo dhclient
sudo systemctl disable systemd-resolved
sudo unlink /etc/resolv.conf
sudo touch /etc/resolv.conf
sudo systemctl restart networking
sudo /etc/init.d/networking restart
sudo ping 8.8.8.8
sudo sysctl -p
systemctl --user daemon-reload

🖱️ 重命名容器(仅可选)🖱️
#This is only needed if you want to replace the terminal other then add more.
#you gotta use your brain here a bit.. 
lxc list
lxc stop 'your_containers'
lxc rename penguin 'something_else' #to switch by the actual one
lxc rename ubuntu penguin #that is if you only want 1 crostini penguin container instead of the debian.
lxc restart penguin
#lxc stop ubuntu that is if u only created an named ubuntu lxc container and crostini
exit
exit

🖱️ 跨访客工具:🖱️

cros-guest-tools 是这里的主要内容(仅供参考)
sudo aptitude install bash-completion bzip2 cros-apt-config cros-gpu cros-logging cros-pulse-config cros-sommelier-config cros-sudo-config cros- systemd-覆盖 cros-wayland curl dbus-user-session dbus-x11 文件熔断 git gnupg iputils-ping iptables ess libxss1 man-dbpulseaudio udev unzip usbutils vim wget xz-utils -y


🖱️参考链接:🖱️

更多信息:https://linuxiumcomau.blogspot.com/2018/08/introduction-to-crostini-part-3-using.html
替代解决方案: https://github.com/jcdang/chromeos-ubuntu-sommelier
额外信息: https ://blog.csdn.net/qq_37401091/article/details/127460700
Debian 到 Ubuntu Crostini: https://www.reddit.com/r/Crostini/wiki/howto/run-ubuntu/#wiki_install_crostini_packages
非常好的信息: http://intertwingly.net/blog/2020/07/21/Ubuntu-20-04-on-Chromebook
容器权限选项: https://stgraber.org/2014/01/17/lxc-1-0-unprivileged-containers/


1 个赞
🖱️如需本指南的更新后续内容,请 Fyde 为我翻译:▼

可用的 LXC 实时映像列表 - :point_right: RIP - :point_right: 解决方案

由于 Canonical 的原因,images: 远程服务已不可用,因此我们添加一个不同的 mirror-images: 服务器:

lxc remote add mirror-images https://mirrors.tuna.tsinghua.edu.cn/lxc-images/ --public --protocol simplestreams

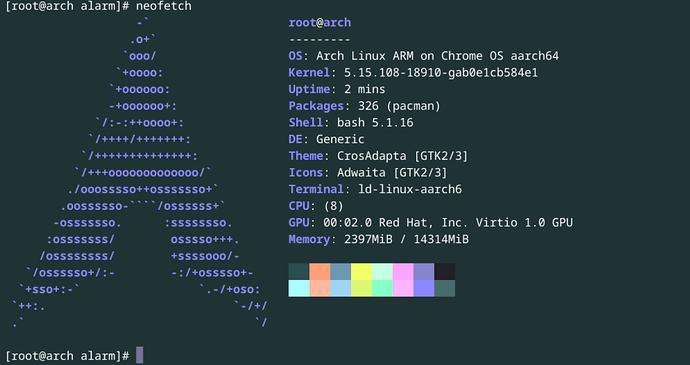
Crostini ArchLinux 企鹅 :white_check_mark:

为了安全起见,首先保持原来的 debian penguin不变 ,只需启用 #crostini-multi-container 标志并再添加一个!

🖱️ 先给你的企鹅侍酒师添加一个Linux:🖱️

克罗斯蒂尼氛围启动并成为 LXC 专家:

打开多个容器的标志。
转到开发人员并添加另一个具有随机名称的容器,它将自动使用您的 IP 创建它。

🖱️授予与您的 Linux 容器的连接:🖱️

启动终端并通过执行 sudo ping google.com 授予您对互联网的访问权限 如果没有返回,则 :关闭Crostini并重新启动它。
6ab4158e696fc7a2a96f245bee273dc8a9d39091_2_690x227

如果需要,请重复该过程。

  1. 开始 Vsh 结束
  • Ctrl+Alt+T 打开 Crosh 终端。
  • 类型vsh termina
  • 如果看到(termina) chronos@localhost ~ $ ,则表示 Termina 已启动成功。

设置 Arch 容器 - 这会将 archlinux 安装到 LXC 容器中

  • 运行以下命令来安装 ArchLinux 容器:
vsh termina # vmc stop termina / vmc launch termina
lxc list
#fydeOS 不能运行 security.privileged 容器,但 openFyde 可以。
#lxc remote add mirror-images https://mirrors.tuna.tsinghua.edu.cn/lxc-images/ --public --protocol simplestreams
lxc launch mirror-images:archlinux/current archlinux
lxc exec archlinux -- bash
# lxc stop / lxc delete / lxc start / lxc console
passwd #设置 root 密码
#systemctl --user restart sommelier{,-x}@{0,1}.service
#尝试 ping google.pt 直到它工作

#安装基本需求
bash <(curl -fsSL https://raw.githubusercontent.com/kwankiu/acu/main/acu) -u
acu -y install base-devel gtk3 openssh xdg-utils xkeyboard-config curl make neovim wl-clipboard fish pacman-contrib wayland xorg-xwayland devtools dhclient neofetch sudo screenfetch

创建您的用户名和密码,例如:‘archlinux’

sudo useradd -G wheel -m archlinux
sudo passwd archlinux

sudo sed -i 's/^# \(%wheel ALL=(ALL:ALL) ALL\)/\1/; s/^# \(%wheel ALL=(ALL:ALL) NOPASSWD: ALL\)/\1/' /etc/sudoers
exit 
lxc exec archlinux su - archlinux
acu install cros-container-guest-tools-git --noconfirm
#ignore permission denied errors
🖱️ 在arm64上你可以只替换用户'alarm'(可选/跳过)🖱️
grep 1000:1000 /etc/passwd
groupmod -n archlinux alarm
usermod -d /home/archlinux -l archlinux -m -c archlinux alarm

#sudo sed -i 's/^# \(%wheel ALL=(ALL:ALL) ALL\)/\1/; s/^# \(%wheel ALL=(ALL:ALL) NOPASSWD: ALL\)/\1/' /etc/sudoers
#or manually:

passwd archlinux #Set user passwd
visudo
# ^ Uncomment the line that says:
# %wheel ALL=(ALL) NOPASSWD ALL
:wq #(Press ESC and type :wq enter to save and exit)

usermod -aG wheel archlinux
exit 

#lxc exec container su - your_username
lxc exec archlinux su - archlinux

退出 Crosh - 启动 debian penguin 让它建立,然后启动你的 Archlinux,点击它 3 次。

一旦开始,就可以享受乐趣了,Voilá Sudo Pacman Tree Jolie。


🖱️ 吃豆人的额外功能:🖱️
sudo nano /etc/pacman.conf
# ^ Optional: Update pacman config. I prefer to:
#   - uncomment #Color
#   - uncomment #VerbosePkgLists
#   - uncomment #ParallelDownloads = 5

sudo nano /etc/pacman.d/mirrorlist
# ^ Optional: Use a closer mirror. Eg, change
#   mirror.archlinuxarm.org => au.mirror.archlinuxarm.org
#
#   A full list of mirrors are in this page:
#   https://archlinuxarm.org/about/mirrors

🖱️ 网络修复(最有可能需要):🖱️
#Check the network by running (it can't be empty) with:
ip -4 a show dev eth0
#if no connection then:
sudo dhcpcd eth0
#sudo pacman -S dhclient
sudo systemctl disable systemd-networkd
sudo systemctl disable systemd-resolved
sudo unlink /etc/resolv.conf
sudo touch /etc/resolv.conf
sudo systemctl enable dhclient@eth0
sudo systemctl start dhclient@eth0
ping 8.8.8.8

🖱️ 重命名容器(仅可选)🖱️
#Crosh Ctrl+Alt+T
vsh termina
lxc stop archlinux
lxc stop penguin
lxc rename penguin debian
lxc rename archlinux penguin
lxc restart penguin

🖱️基本终端故障排除:🖱️
检查你的基础仓库:`sudo nano /etc/pacman.conf`
sudo pacman-key --refresh-keys
sudo pacman -S archlinux-keyring
sudo rm /var/lib/pacman/db.lck

🖱️ 参考链接🖱️

你可以将其切换到 ArchLinux https://fydeos.io/docs/knowledge-base/linux-subsystem/archlinux/
从 Debian 切换到 Arch:https://shibumi.dev/posts/install-arch-linux-on-chromeos/
Baldrailers 的 Github:https://gist.github.com/baldrailers/09ba52a17219ca1e8fbf233dc8a4b375/
很棒的指南:https://12101111.github.io/install-archlinux-on-fydeos/